


Table of Contents
Key Takeaways
Verdict: Hand-painted cards add a personal touch that store-bought ones lack. You don't need complex skills; simple shapes and the right tools create stunning results.
- 4 Key Themes: Master the Christmas Tree Forest, Winter Night, Pearl Ornaments, and a classic Wreath.
- Techniques: Use masking fluid to preserve crisp white snowflakes and metallic pearl pigments for festive sparkle.
- Main Supplies: 300gsm watercolor postcards, watercolor pearl pigment set, Fuumuui extended points brush set.
Looking for fresh watercolor Christmas card ideas this year? There is nothing quite like receiving a hand-painted card. It transforms a simple holiday greeting into a keepsake.
These simple watercolor Christmas cards are easy and fun to make! Today your will learn four unique techniques for crafting stunning holiday cards. Whether you are a beginner looking for easy watercolor painting ideas or an experienced artist wanting to try new tools, we will guide you through every brushstroke.
Grab your supplies, let's begin!
The Toolkit: What You Need for Painting Christma Cards
Before we dive in, let's prepare our workspace. For these tutorials, having the right tools makes all the difference:
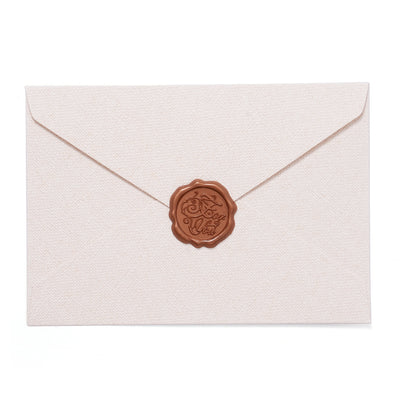
Paper: High-quality Watercolor Postcards (300gsm is best to prevent buckling). Once you've finished your watercolor painting, put it in an envelope and mail it to a friend or family member far away.
$24.00$18.99
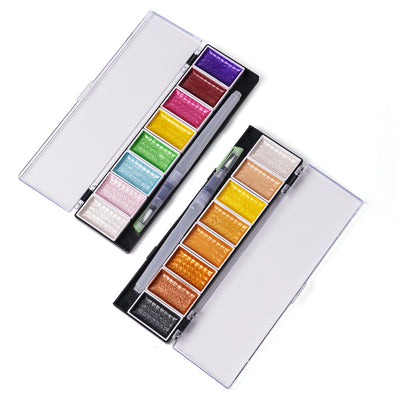
Paints: A standard watercolor set + Watercolor Pearl Pigment Set (for that holiday sparkle!).
Brushes: I used the Fuumuui Extended Points Brushes (Size 14 & Size 4). Why? Because their long tips allow for fine details while the belly holds plenty of water for washes.

Essentials: A pencil, masking Fluid, masking tape, two jars of water, and paper towels.
Easy Watercolor Christmas Cards - Christmas Tree Forest
In this first tutorial, we will create a dreamy, misty forest. This style is loose and forgiving—perfect for beginners.
Materials: paper tape, pencils, and the Extended Points Brushes Size 14 and Size 4.
Colors: Yellow-green, Tree Green, Olive Green, Emerald Green, Burnt Brown, and Metallic Gold.
You can also watch our tutorial videos.
Step 1: Set the Stage
Secure your card to the table with masking tape. Using your Size 14 brush and clear water, wet a rectangular area in the center of the card (about two-thirds of the height). We will use a dry-wet technique to bring the image to life.

Step 2: The First Tree
Prepare a medium-strength pigment using transparent yellow-green. Maintain equal parts pigment and water. Begin with the tree on the left. Start by drawing a line as the top, then sweep the brush left and right to create branches. This creates an abstract tree look, so don't stress about perfecting the details. Don't stress about perfection—let the water do the work!

Step 3: Layering Colors
Repeat this process moving across the paper, switching to darker greens (Olive, then Emerald).
Pro Tip: Is your paint not flowing? Your paper might be drying out. Gently dab a little clear water into the blank spaces between trees to keep the humidity up.

Step 4: Vary the Composition
The trees in the scene can be arranged unevenly, with varying heights to create a more layered effect.

Step 5: The "Lifting" Technique
Notice paint pooling at the bottom? Rinse your brush, dry it on a towel, and gently touch the wet pool to "lift" the excess pigment. This creates a clean, snowy ground effect. But if you are very satisfied with your flow effect, you can keep it.

Step 6: The Golden Accent
Once the green layer is damp-dry, clean your brush thoroughly and load it with highly saturated Gold Pigment. Paint one or two "hero trees" in gold to make the forest pop. Finally, paint a thin gold border along the edge of your rectangle.

Step 7: Finish It Off
Use your pencil to write your favorite holiday message, like "Joy" or "Noel," at the bottom. Congratulations! You’ve just created a modern, shimmering forest scene!

Watercolor Christmas Card #2: Winter Night Snow Forest
This Christmas card idea uses masking fluid to preserve the white of the paper, creating a striking contrast against a moody blue sky.
Materials: masking glue, a masking brush, a cleaning cloth, an Extended Points Brush Size 4, and an Extended Points Brush Size 14.
Colors: Cobalt Blue, Indigo, Sap Green, and Black.
You can also watch our tutorial videos.
Step 1: Masking the Snow
Secure the card. Dip your gel pen in masking liquid and draw a left-to-right slash across the paper, creating trails of white snowflakes. Then, use the pen tip to dot the snowflakes in the design. Continue applying the masking liquid until it transitions from glossy to matte. Once it dries completely, you can begin painting.

Step 2: The Sky Gradient
Mix Cobalt Blue with water (1:1 ratio). Starting at the top 2/3 of the painting, apply the blue, moving from dark at the top to light near the horizon. If the paint is too thin near the bottom, use a tissue to dab it, keeping the "snow" area bright.

Step 3: Deepening the Night
Apply a deeper blue layer directly using indigo (with a large amount of pigment) at the 3/2 position along the edge.
Clean your brush and add a little water to it. Mix the two blues together.

Step 4: Adding Depth
Mix Indigo with a touch of Black. Dot this dark mixture at the "roots" of your masked trees while the paper is damp. This creates soft shadows.

Step 5: Shadows on Snow
Mix a very watery, pale blue. Paint subtle shadows on the white snow pile at the bottom to give it volume.

Step 6: Foreground Trees
After the paint dries, use leaf green to make a medium-strength paint. Start with the tree on the left. Draw a line as the top of the tree, then sweep the brush left and right to form the branches. Don't worry about covering the white snow on the tree—it's already masked with a masking liquid.

Step 7: The Background Layer
Now use your Size 4 Extended Points Brushes to dip in black and indigo, creating a slightly darker tone, and begin painting the background layer of your trees. The paint should remain slightly absorbent. Paint the trees in a somewhat abstract style, varying in height. These will become the distant trees.

Step 8: The Reveal
Once your painting is completely dry, use the cleaning cloth from the concealer set. Gently drag one corner in one direction to effortlessly lift the concealer. Repeat this motion to achieve a spotless finish. For added depth, apply a light blue tint to the blank areas and the bottom of the painting.

Step 9: Finish
Use your pencil to add a warm greeting. You now have a serene winter landscape ready to gift.

Watercolor Christmas Card #3: Shiny Dreamy Decorative Ball
This tutorial showcases the beauty of Pearl Pigment Set. Simple shapes meet elegant details.

Materials: All you need is an Extended Points Brush Size 4.
Colors: Pearl Pink, Ruby Red, White Gold, Light Blue.
You can also watch our tutorial videos.
Step 1: The Perfect Circle
Find a round household object (like a tape roll or cup). Place it on your card and trace a circle lightly with your pencil.

Step 2: Wetting the Shape
Use a clean brush to apply water inside the circle. Move slowly and let the water soak into the paper. When the paper is fully wet, it will be easier for the next painting step.

Step 3: Blending Pearls
Next, you will use light pink and ruby red. Dip the wet brush into the palette and apply light pink evenly across the wet circle. Then, use ruby red to add layers of color to the edges, blending them toward the center.

Step 4: Fine Details
Switch to the No.4 Extended Points Brush. Dip it in White Gold and draw a straight vertical line from the top of the card to the ornament. Then, use Light Blue to paint a delicate bow.
Why this brush? The "Extended Point" acts like a rigger brush, holding enough paint for uniform, unbroken lines without running out of ink halfway.

Step 5: Pine Needles
Hold your Extended Points Brushes slightly upright to create finer lines. Draw pine needles in various directions, varying their length. With the right tools, painting becomes effortless.

Step 6: Finish
Using a brush dipped in ruby red, apply decorative dots or lines at the junctions of the decorative balls.
You've created a stylish, minimalist card!

Watercolor Christmas Card #4 - Christmas Wreath
Wreaths are a classic Xmas card idea. This loose, botanical style is fun and relaxing to paint.

Materials: All you need is an Extended Points Brush Size 4.
Colors: Alizarin Red, Leaf Green, Cobalt Blue, Orange.
You can also watch our tutorial videos.
Step 1: Highlights First
Secure the card edges with tape to prevent movement during painting. Use a Size 4 Extended Point Brush to mix alizarin red pigment with water in a 1:1 ratio, leaving blank dots as berry highlights.

Step 2: Painting Leaves
Press lightly with Brush, then lift the brush to instantly create a leaf. Here is where the Extended Points Brush shines. This "Press & Lift" motion creates a perfect leaf shape instantly. You can also combine them in various ways to form different leaf shapes. The brush tip can draw finer leaves, adding diverse forms to your artwork and making it more vibrant and engaging. Combine these strokes to form the circle of the wreath.

Step 3: Layering Foliage
Next, use Extended Points Brushes to dip in leaf green and draw the vein. Begin by painting the first layer of pine needles. After cleaning the brushes, use orange to paint the second layer, adding variety by painting the needles in different directions and positions to enrich the composition.

Step 4: The Message
Use the fine tip of your brush (or a gold pen) to write "Merry Christmas" or a blessing in the center of the wreath.

Step 5: The Splatter
For a final festive touch, load your brush with watery paint and gently tap the handle against your finger to splatter tiny dots around the wreath. It adds a lovely, organic texture.

Join Fuumuui and Share Your Work
We hope you'll join us in discovering fresh ideas for Christmas watercolor cards! If you've created your own artwork, don't forget to tag us @FUUMUUI.
If you'd like to see more Fuumuui's artwork, you can find it on our Instagram and YouTube.


I love Fuumuui! finally, a company with brushes and watercoiors that inspire me. I make simple greeting cards, and your products raise my work to a whole other level.